With the shortening days (at least here in the Northern Hemisphere) we are being treated to some of the most glorious sunsets and sunrises. Do you have trouble capturing sunsets or sunrises? If so, here are a few tips to help you capture all those blazing colors.
Read on . . .
First and foremost, there is no shame in resorting to your “Sunset/Sunrise” scene mode on your camera. Most cameras, including the expensive DSLRs offer scene modes, but you will most likely find a Sunset/Sunrise mode on your point and shoot camera. Don’t ignore it. It can be a very effective teaching tool.
Try this:
- Take a photo of a sunset or sunrise on your camera’s AUTO setting.
- Take a photo using your own settings.
- Take a photo using your camera’s LANDSCAPE mode.
- Take another photo, but this time using your camera’s Sunset/Sunrise SCENE MODE.
- Examine the photos (preferably on your computer screen), but you can quickly review them in your camera’s “playback” menu.
- Which photo is better? Look for good contrast, strength of color, etc.
- Now check the “properties” of the photo you prefer (it is probably the one you took with the scene mode employed). Be sure to press your “DISP” or “INFO” button, or whatever button (perhaps the “magnifying glass” on a Nikon) as many times as is necessary to bring up all your photo’s information.
- Examine the information: shutter speed, aperture width, ISO, WB, saturation levels, “exposure compensation” level. What settings did the camera use to capture those colors? Are you surprised by the exposure compensation setting? The saturation level?
- If you aren’t quite satisfied with any of your photos, but you like the one you took using the scene mode best, try altering one aspect of your photo at a time. But only ONE aspect at a time.
Referring to the information displayed on the photo you like the best, begin to change specific settings: the shutter speed, or open the aperture, or change the ISO setting, or choose a different metering mode, or decrease the saturation or the contrast level. Take a new photo after each change. Stay to ONE change only so you can determine which change improved your photograph. - Be prepared to use a tripod or “jam” your camera to ensure a steady photo devoid of camera shake or blur.
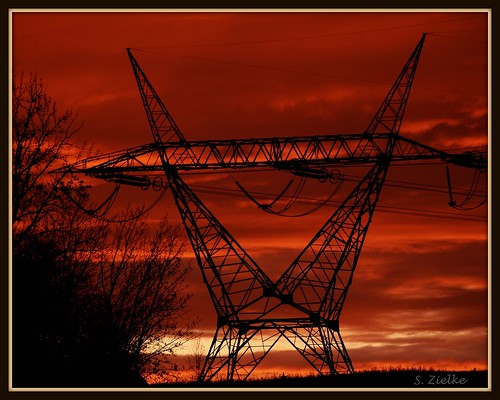
- Pick a great subject; the sunrise or sunset itself has been photographed billions of times and is not really that interesting. Use the colors as a backdrop for another subject instead like the power lines above, or the oil derrick below.
- Take lots of shots; you are using a digital camera after all. Throw away the ones you don’t like but try not to do that in the field. It’s more efficient to make your decision as to what gets trashed after viewing your images on your computer’s monitor.
CAUTION! Never point your camera directly at the sun — you will burn your image sensor. Focus on the bands above or below the sun, to the side, or focus on a foreground subject, but never directly on the sun.

PS The temperatures during early morning sunrises might be very cool. Remember the hat, the gloves, and keep those batteries warm.
Wishing you safe and happy travels,
Sheree Zielke
Tags: automatic modes on digital cameras, digital camera scene modes, learning from your digital cameras scene modes, photographing sunsets and sunrises, sunrises, sunsets
Sheree,
Thank you for your tips. You are so right, only by experimenting with your own camera do you find what works best for the situation. I\\\’m off to a 2 week Colorado plateau national park vacation next week, with tripod, and if I can\\\’t capture some decent sunrises/sunsets from Denver west to the Grand Canyon, they can\\\’t be had. I\\\’m certainly going to kill myself trying. This is the first vacation I\\\’ve ever gone on with the sole purpose being capturing memorable photos.
Shelly