March 2nd, 2009

Be sure to pay a visit to these special patients the next time you are in the Florida Keys.
Turtle Hospital? What’s a turtle hospital? We were staying in Marathon, Florida which is nicely situated between Key Largo and Key West. Our drive to Key West took us past an unusual sight, especially if you are from northern Canada, like we are. Glad we stopped.
Read the rest of this entry »
Tags: a hospital for turtles in hidden harbor, sea turtles, turtle hospital in marathon florida, turtle rescue center in the florida keys, turtle rescue operation, turtles
Posted in Adventure Travel, Family Vacations, Florida, Tourist attractions, Travel with kids, Variety | Comments Closed
March 2nd, 2009

Lewis, our terrific taxi driver on St. Lucia, shows off his chicken coop.
St. Lucia lies in about the middle of the arched string of Caribbean islands located between the Dominican Republic and South America. It’s one of the prettiest islands to tour, and, as far as I know, it’s the only place you can chow down on “cow heel” soup. And the only place I have ever been where your cabbie will take you to his house.
Tags: adventure travel in the caribbean, cab drivers in st. lucia, caribbean islands, cow heel soup, sheree zielke, st. lucia, taxi drivers in st. lucia
Posted in Adventure Travel, Caribbean, Cemeteries, Cruise Ship Travel, Ports of call, Tourist attractions, Travel Destinations, Tropical Destinations, Variety | 2 Comments »
February 27th, 2009

Amazonian home near Santarem, Brazil
Despite a history of gold deposits and despite being one of the largest cities located along the Amazon, Santarem and the surrounding area is rich with the flavour of days gone by. If you are seeking a more historical Amazon, slower-paced, and a more pastoral bit of civilization, then Santarem is the place to go.
Read the rest of this entry »
Tags: amazon river adventures, amazon river boat rides, ports of call in brazil, Santarem Brazel, the real amazon, travel in south america
Posted in Adventure Travel, Brazil, Cruise Ship Travel, Ports of call, South America, Tourist attractions, Travel Health, Tropical Destinations | Comments Closed
February 24th, 2009

Do your knees quake at the thought of swinging across the jungle canopy suspended from a steel thread? If so, zip-lining may not be for you. But if you are into a fun exhilarating adventure, then be sure to book a zip-lining adventure in a place like Belize or St. Lucia. But take some precautions first.
Read the rest of this entry »
Tags: Belize, dangers of ziplining, is zip-lining dangerous, st. lucia, zip-lining accidents, zip-lining in the rain forest, zipping through the jungle
Posted in Adventure Travel, Belize, Caribbean, Cruise Ship Travel, Ports of call, South America, Travel photography, Travel safety, Travel tips, Tropical Destinations | Comments Closed
February 24th, 2009

Tentative Touch – EXPLORED
Dominica in the Caribbean, is a small island that plays big. Especially if you brave the tiny winding roadways filled with rubble, and make your way up to the rain forest aerial tram. Bring your rain poncho.
Read the rest of this entry »
Tags: adventure in the caribbean, cruise ship shore excursions in dominica, how to experience the rain forest, rain forest aerial trams, rain forest trams in dominica, riding a gondola through the rain forest, roseau dominca
Posted in Adventure Travel, Cruise Ship Travel, Ports of call, Tourist attractions, Travel Destinations, Travel tips, Tropical Destinations, Variety | Comments Closed
February 22nd, 2009

If you think coming through airport security in North America is tough, try South America — in particular — Brazil. I couldn’t believe what was confiscated from me in the Manaus airport recently.
Read the rest of this entry »
Tags: airline travel in south america, brazil airport, manaus airport security, what is allowed in your carry-on bag
Posted in Airline Travel, Brazil, South America, Travel - General Advice, Travel tips, Variety | 3 Comments »
February 21st, 2009
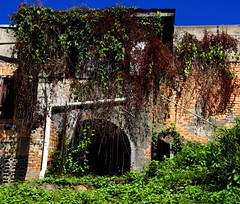
Handyman Special: A Fixer-Upper in Scarborough, Tobago
Here is an instance where smaller just might be better. Tobago is much smaller than its sister island of Trinidad (Tobago is only about 26 miles long and 6 miles wide), but you might discover it has way more charm.
What’s more is that the cost to travel around the island is affordable compared to other places in the Caribbean.
Read the rest of this entry »
Tags: caribbean island destinations, cruise ship ports of call, rain forest reserve, scarborough, taxi drivers in scarborough, tobago
Posted in Adventure Travel, Caribbean, Cruise Ship Travel, Family Vacations, Ports of call, Travel Destinations, Variety | Comments Closed
February 20th, 2009

“Hey, lady! Want to meet my pet?”
Boca da Valeria. Ever heard of this place? It’s a tiny village in Brazil. If someone offers you the chance to visit here, grab it. It’s not the greatest experience you’ll ever have, but I guarantee it will be an experience you have never had before.
Boca da Valeria is located on the great Amazon River in Brazil. For some people, this tiny village is just not there thing. But for others, it is the perfect out-of-the-ordinary adventure.
Read the rest of this entry »
Tags: adventure travel in south america, Amazon River, Boca da Valeria, Brazil, exotic pets, tarantulas, village children
Posted in Adventure Travel, Brazil, Cruise Ship Travel, Ports of call, South America, Travel Destinations, Variety | Comments Closed
February 10th, 2009

Deserted Old-timers on Devil’s Island, French Guyana
Devil’s Island was made famous in the movie starring Dustin Hoffman and Steve McQueen: “Papillon.” But the Devil’s Island that tourists are welcomed on today is not the island associated with the unfortunate French prisoner, Papillon (Henri Charriere).
Read the rest of this entry »
Tags: Devil's Island, Dustin Hoffman movies, French Guiana, French penal colony, Guyana, Henri Charriere, Isle Royale, Napoleon, Papillon, Royal Island, St. Joseph Island, Steve McQueen movies
Posted in Adventure Travel, Cemeteries, Cruise Ship Travel, Family Vacations, Ports of call, South America, Tourist attractions, Travel Destinations, Travel photography, Variety | Comments Closed
February 3rd, 2009
“Two if by Sea!” or Stealth Ship
If I NEVER return to St. Barth’s in the Caribbean, it will be too soon.
Some places, and some of the the inhabitants of certain places, take themselves all too seriously. St. Barth’s is like that. From the moment my foot hit the dock, I suspected that this was not the place for me.
Read the rest of this entry »
Tags: caribbean islands, cruise ship ports of call, david letterman's vacation house, island retreats, island vacations, islandsd for the rich and famous, st. barthelemy
Posted in Caribbean, Cruise Ship Travel, Ports of call, Travel Destinations, Tropical Destinations, Variety | Comments Closed


